


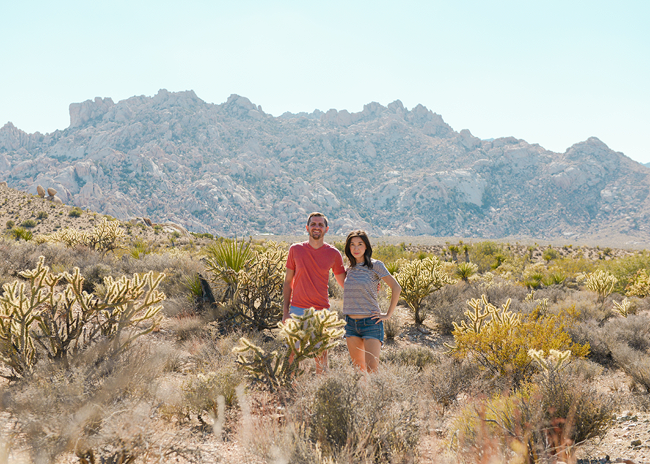
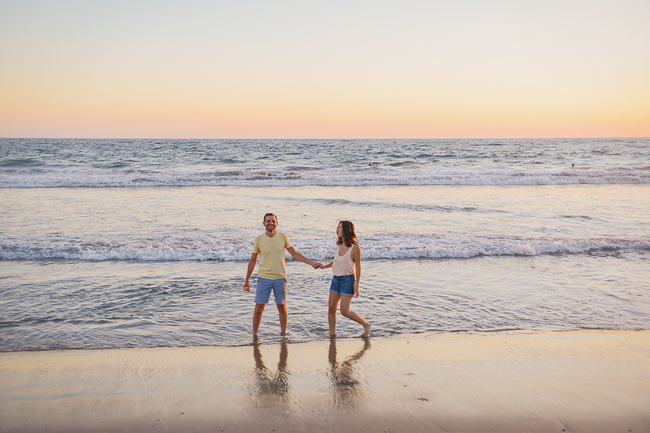
This September, Scott and I took a two-week road trip across America, hugging Route 66 from Chicago to Los Angeles! It was an experience of a lifetime – exhilarating, inspiring and exhausting all at once – and one that we’ll absolutely be talking about for years to come. From the moment we booked the rental car, I was most excited about the photos I couldn’t wait to capture; there would be so much to explore and see. Scott always says that I’m happiest with my camera in hand, and this only intensifies when we travel!
That said, here are my photo tips, tricks and ways to stay organized on your vacations – from much needed weekend getaways to epic adventures!

Use your surroundings for support.
When you’re travelling on your own or with a small number of people, it can be hard to get a photo of the whole crew if no one else is around.
- We travel with a mini tripod that can tuck easily into a backpack, purse or carry on luggage, and we use the help of any horizontal surface we can to set up a shot!
- We’ve also been known to balance our camera on rocks and car hoods, and we make use of the Velcro strap on our travel tripod to secure our camera to sturdy tree limbs and street signs.

Consider everything from the ground to the sky.
Whether I’m taking photos with my smart phone or my hefty DSLR, I’m carefully setting up the shot from my viewfinder before I ever click the shutter release.
In other words, I’m intentional with the photos I take. As you look through the viewfinder of your camera, pay attention to what you see. From the ground to the sky (floor to ceiling!), notice the moment you’re capturing. I might ask myself, do I want to shoot this straight on? If so, I’ll take a second to square up my edges to keep the perspective from being skewed.
Although digital photography makes it easy (and more importantly, cheap) to take as many photos as you’d like, by being mindful of your shots, you’re creating less work – and clutter! – for you to sift through later.


Be bold!
How many times have you been on vacation and had to walk behind someone or duck under the lens of shots being taken? In crowded, more touristy areas, it’s almost expected, and with smart phones becoming the camera of choice for most, this is pretty common anywhere!
Our friends will often tell me that they don’t want to bother with causing a scene every time they want to take a photo; it’s too crowded or they don’t want to disturb others around them. I get this (I really do!), but every now and then, it’s okay to be the one that needs to pause and capture The Shot.
How many other chances will you get? Be bold yet mindful, then move on.


It’s all in the details.
If your goal is to make an album (whether online or in print) of your trip, think about the details in your day that make your time away from home unique. Is it that amazing cup of coffee? Is it the crowds ordesolation? Is it the vibrant colors of the new-to-you city? I encourage you to capture these small moments.
Once you’ve come home, unpacked and you find yourself back in your daily routine, you’ll look through these photos as a whole. It will read like a story, evoking more emotion than only photos of landmarks or selfies ever could.


Don’t delay the organizing and editing.
Now that you’re home, if you’re like us, you have memory cards and a camera full of many, many photos! Initially, it can feel a bit staggering to go through each and every image, and it’s at this point that I typically hear people ask, now what? Here’s a rundown of my next steps:
- First and foremost, I dump every digital file into a folder on an external hard drive and organize them in order of capture time. (Dropbox is another great option to keep your computer hard drive from getting bogged down.) I’ll name this folder with a date and trip title, such as: 2015-09-route-66.
- At this point, it’s so important to go through and cull your photos, choosing only your favorites and deleting the rest. This is always hard, but for the first round, I like to give each photo a 5 second look and go with my gut. Are eyes closed? Is someone mid-blink? Delete!
- Narrowing down the photos might take several rounds (it does for me!), but once I have a manageable amount, I’ll finish with light edits to make the photos pop. I prefer Adobe Lightroom, but if you’re new to photo editing, the software offers a free trial.

Print and share!
I’m just as guilty as the next person of watching my digital photo files collect dust. Rather than allow myself to fall into that trap, I’ll set aside time to frame photo prints of favorites (for the home and mom and dad, naturally!), and for longer trips such as our most recent Route 66 adventure, I love making photo books for the coffee table! The hardest part is getting started, but I always find myself having way, way too much fun once I do.
I’ll be back to share how we made our panoramic book using Pinhole Press!